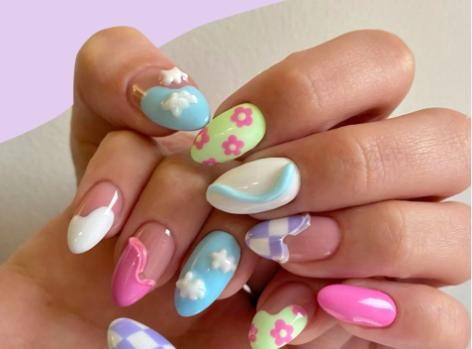
Do you enjoy having different textures on your nails? Perhaps you do and are unaware of it. Traditionally, well-polished nails should be as smooth as possible, with no lumps, bumps, or roughness. It’s understandable if you’ve never deviated from that norm when making nails. However, 3D drip nail art designs are currently popular with specialists. Smoothness is still a decent rule of thumb for the foundation layer in order to construct what’s on top, but more than ever, you may be willing to experiment with texture.
Why is 3D drip nail art design so popular right now?
We believe that it is a tactile thing for many individuals. Raised textures are just interesting, gratifying, and even soothing to the touch. They also look pretty great with the increased dimension!
There are numerous techniques for incorporating texture into your finished nail designs. If you’re not familiar with the trend or want to try something new, here are 10 ideas to get you started and how to approach them.
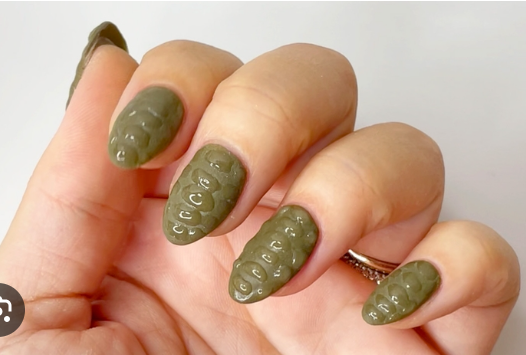
1. Floating Blobs
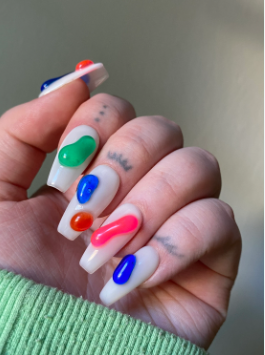
This simple approach serves as the foundation for many 3D drip gel nail designs. You can do a lot more once you can generate a gel blob. The idea is to apply hard or building gel, position your blob as desired, and cure without allowing it to move. With this method, clear gel looks incredibly detailed over a variety of colors and glitter. Make some organic shapes and have some fun with them.
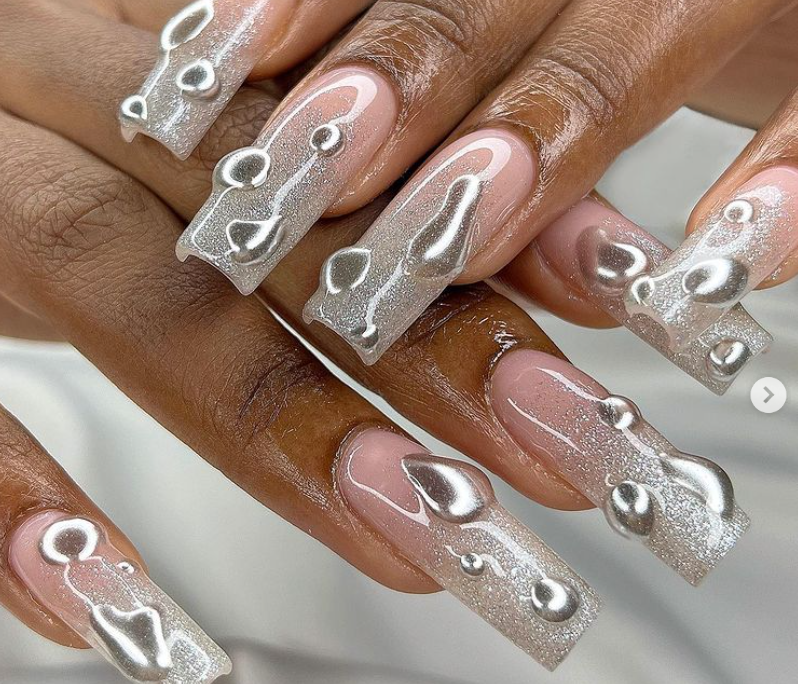
2. Drops of Water
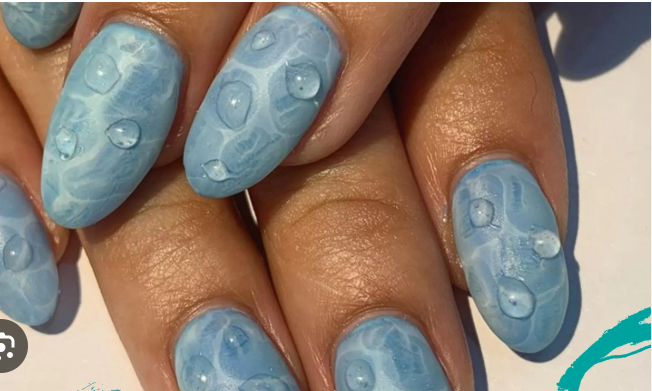
This is the simplest design to realize. Make some small, round, or somewhat drippy lumps of transparent gel and cure as described above. This gives the nail a “just rained” look that complements any design underneath. This straightforward procedure may be performed with any clear gel or normal polish.
3. Shells from the sea
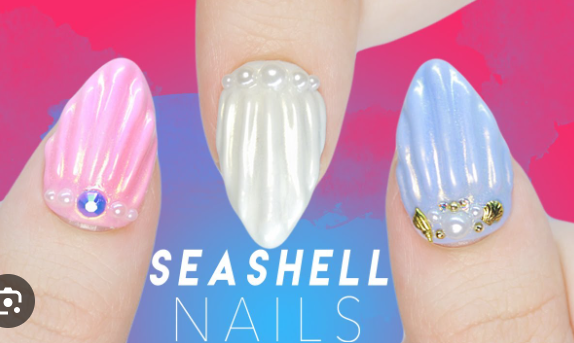
This enchanting design may appear complicated, but it is actually quite simple to create. Load a liner brush with gel and draw vertical stripes, ensuring they virtually meet at a point at the cuticle. This will provide the fan-shaped rippling texture seen on a seashell. The best nail shapes for this appearance are oval and almond.
4. Pearls

Flat-backed pearls are a sophisticated and fashionable complement to any plain nail style. Apply them like any other crystal, but make sure to use a decent gel to keep them in place. Whether you use a few or many pearls, the bumpy texture of this look is sure to satisfy.
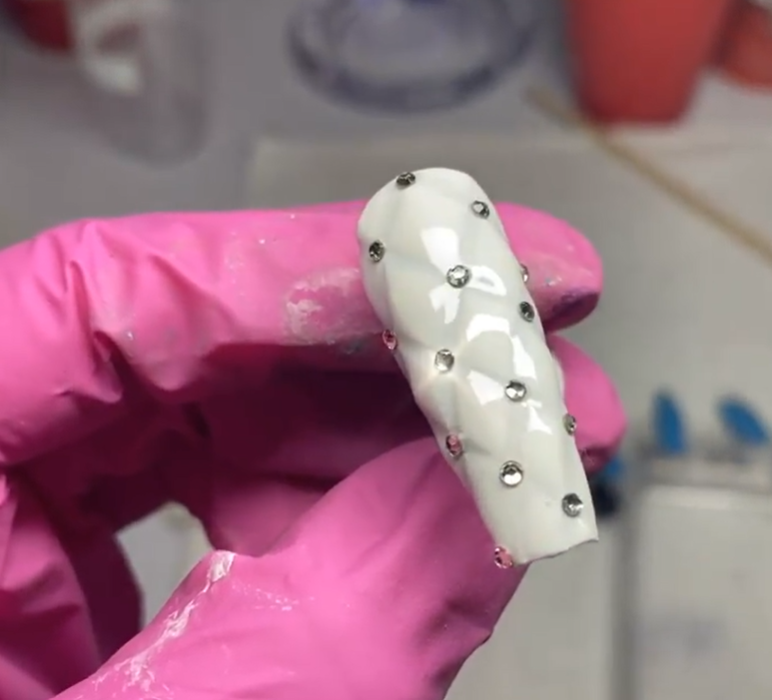
5. Steel Plate
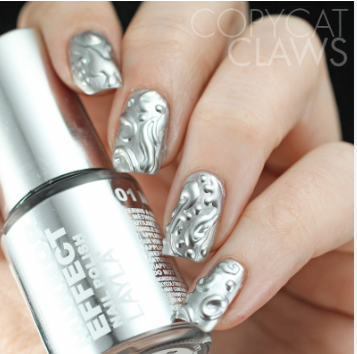
This design is the work of Australian nail designer Lili Taylor and demonstrates how much fun 3D gel textures can be. Taylor used a childhood recollection of steel diamond plates and turned it into a unique nail aesthetic. To achieve the steel plate look, paint alternating groups of stripes in gel over a chrome foundation.
6. Matte Groovy

This matte appearance was inspired by some colorful rugs and was achieved by first applying a standard base color with a matte texture, then dusting clear acrylic powder over a lively gel design before curing. It has a beautiful sandy texture and resembles velvet.
7. Skin of a Crocodile
The popularity of 3D textured croc nails has recently risen, usually done in a single color for maximum effect. The method is identical to the groovy matte effect described above: sprinkle transparent acrylic powder over a gel pattern. The rough texture is ideal for creating the appearance of croc skin.
8. Drips of Mercury
Although elemental mercury is beautiful, we know it is extremely toxic. It’s a good thing you can replicate the appearance on your nails! Create your gel drips as in prior designs, cure them, and then dust them with chrome powder.
9. Acrylic Flowers
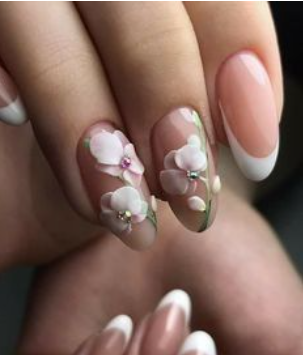
3D flowers are an excellent technique for acrylic technicians to learn. Use a little bead of acrylic for each petal, pressing it down as you place it and dragging it outwards. Finish each flower by inserting a crystal into the center. Your client is now delightfully flowery.
10. Crystal Cushion
Everyone knows that costly cushions exude a sense of opulence. Depending on the medium, there are numerous ways to achieve this cushion nail design, but the simplest is to use ordinary polish. Coat the nail twice, wait until half-dry, and then gently press diagonal indents into the polish with a floss pick. This design works well in either a glossy or matte finish. Finish the look with a crystal or pearl in each corner.
Bonus: Combine and Contrast
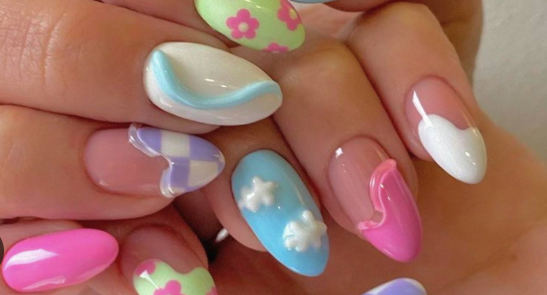
Now that you know how to apply these 10 trendy 3D nail patterns, you can mix and match them to create some pretty unique appearances! All of these looks are simple to recreate if you have the correct materials and tools. So go ahead and dazzle your clients with some unusual forms and textures.


Utkarsha Gupta is a fashion writer with 7 years of professional writing experience and holds a PGDM degree from FMS IRM, Jaipur. Though she came from a management background, my zeal for writing motivated her to pursue a career in the content industry. Utkarsha is well-versed with writing SEO-friendly articles. she has been creating articles specializing in trendy hairstyles, fashion trends , trendy accessories and trendy nail art. Utkarsha hooked to create unique and interesting content through timely research and analyses of the reader’s interest.